Showing posts with label Nail Varnish. Show all posts

Saturday, 26 April 2014

SPRING SHADES: Barry M Hi-Shine Gelly Polishes


Another day, another nail varnish shade. The fact that I'm not allowed to wear nail polish at college has forced me to develop the habit of changing up my nail shades after a day or two. And aside from one polish that will be featured in my up-coming April Favourites, these three have been amongst my most reached for.
 
Barry M's Gelly Hi-Shine Polishes are a fresh take on regular nail varnish - extra shine, extra pigmentation, extra beautiful shades. Seriously, the shade range for this line: delicious. I have several of the pinker shades on my lust list, but these three are the ones I currently own 'Blueberry' (the lightest blue), 'Blue Grape' (the darker blue) and 'Prickly Pear' (the lilac). They give gorgeous colour and shine within two coats and last really well paired with or without a top coat.
 
Blue Grape is definitely my favourite, paired with an all black outfit and red lips, although Prickly Pear has started to grow on me on sunnier days. And how adorable is that shade name? Cute.
 
xx

Sunday, 9 February 2014

Current Go-To Nail Shades


Spring is approaching! And as distant as that may seem due to the impending weather difficulties in the UK, I am holding on to the hope that it's still on it's way. Obviously due to the previous point, the weather has put my spring clothing on hold so I have been embracing the pretty shades and textures and patterns in such a way that doesn't look too bad paired with my coat and scarf of choice: nail shades.
 
Here I have a mix of textures and colours, all my current go-to polishes (for the days that I'm allowed to wear nail varnish - college rules). Sorry about the dodgy quality of the photo - I had to take this snap within the two minutes the sun managed to break through the dark clouds and so I just went with the best shot I was able to capture! Coloured polishes pictured above are: Revlon's Cupid (the pink), Revlon's Cloud (the pale purple), Revlon's Blue Lagoon (the shimmery blue) and Barry M's Mint Green (the mint green.. obviously). And the three textures are: Sally Hansen's Sugar Coat, Avon's Opal Top Coat and Rimmel's Matte Top Coat. 
Textures:
 
Following the overwhelming but now out-dated success of the 'Crackle' nail varnish, I find it difficult to find unique nail varnish finishes that aren't a little tacky. I may or may not have previously mentioned the Rimmel Matte Finish Pro, but I'll be surprised if I haven't as I adore it. It literally changes any nail varnish into a matte one, whether it's a glitter or a regular polish. The Sally Hansen Sugar Coat is a new find of mine, which leaves my nails textured with a gritty, sand like finish. It's a little scratchy but gives full coverage in one coat and is a bright, clean white. Finally I have my last little grasp on Christmas - a glitter top coat. This one is a bit more subtle and features flecks of shimmery pale glitter, meaning it's great for the pastel spring trends.
 
Colours:
 
As you may have seen in my OOTD birthday post, I absolutely adore Revlon's Cupid: a bright bubblegum pink that gives full coverage in just one coat and lasts for ages. It's probably my most worn colour from this collection, as it always catches my eye if I'm a bit unsure of what to wear. My other two Revlon picks are Cloud and Blue Lagoon. Cloud is one of those shades that has a hint of so many colours that I don't know what to call it - a grey-ish lilac-y blue? It's super flattering despite it's split personalities, colour wise, and despite it's paleness, it only requires two coats to give intense colour. Blue Lagoon is a pretty pale blue laced with a subtle silver sparkle that works really well with my silver crown ring as it sets off the shimmer. Finally Barry M's Mint Green is my green of choice, but it's quite wishy-washy so I sometimes apply a white polish as a base to get maximum colour. 
 
Again I apologise for the poor quality of these photos - hopefully the weather will lighten up a bit soon! I hope you all had a good week.
 
xx

Thursday, 12 December 2013

Nail Varnish Storage Ideas


All photos have been taken from Pinterest
 

I'm currently going through the planning stages of re-decorating my bedroom: I say planning stages, because I've so far changed my mind about the colour scheme three times and I'm undecided on what sort of feel I'm going for. But one of my most solid (and probably most necessary) ideas is that to re-organise my make-up. At the moment it's mostly tucked away in drawers (to see my actual organisation click here) and I've decided I'd like to display it properly.
 
So I took to Pinterest to give me some inspiration and thought I'd share with you guys my favourite picks.
 
The first is to display my polishes in a beautiful glass storage jar. This idea to me seems to be a good one and a bad one: it's very pretty but seemingly impractical. Imagine wanting the polish at the bottle of the jar? The second and most realistic is to use a spice rack. I adore this idea, I think the polishes look so organised and you'd be able to see exactly what colours you have from a glance. The red ones are actually the Ikea spice racks which are just £3 each! Finally, the third idea is to display them on a cake stand. I think this one is so cute and would definitely look the prettiest on a dressing table, maybe with a few perfumes and make-up bits within the mix, too.
 
What do you think of these ideas? And how do you organise your nail varnish collection?
 
Look out for a few more photo based posts as I gain more ideas and inspiration (probably from Pinterest)!
 
xx

Thursday, 21 November 2013

Step By Step: Catching Fire Nail Art! (The Hunger Games)


I'm not sure if I've ever mentioned this before and I'd be very surprised if I haven't but I am a super crazy massive geek over The Hunger Games. I can pretty much have one sided conversations quoting any of the books (which I've read more times than I can count) and can explain situations from them to people who have never read them before in embarrassingly intricate detail.


So following this admission I'll also tell you guys that I may or may not have missed college today to go and watch it at 11am this morning (don't judge me). The film was INCREDIBLE and played so well with the book - I felt that The Hunger Games wasn't really up to scratch - but I think that whether you've read the books or not you'll love Catching Fire.
 
I better stop here before I start getting into more detail because I really wont stop.
 
Okay, moving on. In recognition of my love for The Hunger Games I decided to try out a nail art in honour of Katniss and Peeta's chariot ride outfit. I'm really really happy with the way it turned out and feel that even though this nail art is aimed at The Hunger Games, it could translate into a pretty night-out nail art if you use different coloured paints.
 
 
You Will Need:
 
Black nail varnish
 
Either red glitter nail varnish or just plain red
 
Either orange glitter nail varnish or plain orange
 
Either yellow glitter nail varnish or plain yellow
 
3 Eye shadow sponge applicator or a make-up sponge
 
Gold/silver glitter (only if you aren't using the glitter polishes)
 
Steps:
 
Step One: Paint all of your nails black. Apply two coats if needed.


Step Two: Using the red nail varnish, paint a blob shape from the nail tip down as far as you like. This will act as a guide for where you're going to apply the glitter, as well as adding a more colourful base.


 Step Three: Mix the red nail varnish and gold glitter together.


Step Four: Dip the sponge end of the eye shadow applicator into the glitter mixture and dap onto the red outline on your nail. 

Step Five: Repeat step 3 & 4 but with the orange nail varnish. Dab the orange glitter on top of the red, but begin half-way up the red.

Step Six: Repeat steps 3 & 4 but with the yellow nail varnish. Dab the yellow glitter on top of the orange, focusing more on the nail tip.

Step Seven: Seal the design with a top coat.

Finished!
 
I hope you guys enjoyed this nail art tutorial - I definitely enjoyed doing it! Although it's a little messy, I think it works. The end effect is a sort of bobbly, grainy, glittery fire which I think captures the feel of the outfits perfectly!


Source: Google Images.

If any of you guys end up watching Catching Fire, let me know what you thought of it!

xx

Monday, 12 August 2013

Step By Step: Floral Nail Art!


Hey everyone, hope you're all well!
 
As I'm sure some of you know I'm currently on my six week break from college, which leaves me with a hell of a lot of free time. I don't go back to college until the 2nd of September and I never thought I'd say this but I can't wait! I'm continuing my Beauty Therapy studies so on top of my small mobile business I've gained since completing Level 2, I'll have a few more qualifications under my belt!
 
Okay so I went a little off subject there, but my point was that since I have so much free time I've ended up experimenting a lot more with my nail art, partly to include in my portfolio, partly to share with you guys and partly because I'm so bored that I need to do something productive!
 
So here for you today I have a really simple floral print nail art! I swear, it looks so complicated but it's really not. Even you guys who think you're awful at nail art, I swear you can do this!
 
 
The one thing I will say about this nail art is that you do need a variety of colours. The basis it that you layer three tones of the same colour to create the illusion of the flower. I chose to use pink, simply because I have so many different shades of pink that it seemed like the easier option. I also chose to use a mint green background because I think the colours work together really nicely, but as always the colour options are up to you!
 
Difficulty: Beginner.
 
You will need:
 
Background colour of your choice. I chose Barry M's Mint Green.
 
Three tones of the same colour. I chose a hot pink by Bourjois (nameless), my Nail Fix medium pink and Barry M's Strawberry for the lightest shade.
 
A white nail varnish/nail art pen.
 
A dark green nail varnish/nail art pen.
 
What to do:
 
1. Paint all of your nails with your background colour. Leave to dry. (I had to do a coat of white nail varnish under the green as it's very sheer).
 
2. Using your darkest flower colour, using the tip of the brush draw large, irregular blobs in random places on your nail. Try to space them out evenly as you're going to need room to draw the leaves afterwards. This works best if you have hardly any nail varnish on the brush as it's easier to control the flow. Leave to dry.
 
3. Once the darkest colour is dry, apply a smaller blob of colour in the middle of it using your medium flower colour. Leave to dry.
 
4. Once the medium colour is dry, apply an even smaller blob of colour in the middle of the medium shade. Leave to dry.
 
5. Once you've finished your flowers and they're completely dry, you can draw little triangles on random edges of the flowers to create leaves. I did this using a nail art pen but you can use a nail varnish and a nail art brush if you prefer.
 
6. Now that you're finished with the flowers completely, you can choose what simple design to do on the rest of your nails. You can choose to leave them blank if you want, but I just dotted some white dots using a nail art pen on them.
 
7. Seal with a  top coat and you're done!
 
As ever with these nail arts, if you re-create this look then tweet me a photo at @laaurenpiperx as I'd love to see them!
 
I hope you all have a good week!
 
xx


Sunday, 11 August 2013

DIY Sunday: Simple DIY Manicure!


Hello everyone!
 
Following last week's DIY Sunday Cinnamon Body Scrub post (here), I thought we'd put the product to good use and use it in a manicure! Of course all of the products I feature in this post can be switched out for your favourites, but I thought since I made the scrub I might as well use it.
 
 
I was taught how to do a 'proper' manicure at college where I studied Beauty Therapy, but you can choose to re-arrange or skip some of these steps to suit yourself. It's such a simple thing to do, and yet I feel so luxurious afterwards. I give myself a manicure once every 2 weeks or so, but in the winter I do them more regularly as my hands get so cracked and dry in the cold. Not nice!
 
You will need:
 
- A bowl filled with warm water (large enough to fit your whole hand in) and two towels.
 
- Bubble bath of your choice. I chose Radox's Relax.
 
- Hand Lotion of your choice - I chose Kaeso's.
 
- Nail file, hoof stick (the little white thing you push your cuticles back with)
 
- Nail varnish remover & cotton wool. I have Boots Nail Varnish Remover Pads, they're amazing!
 
- Body scrub of your choice. You can use a manicure scrub if you have one to hand. I'm using the Cinnamon scrub I made last week!
 
- Cuticle Cream/Lotion. This isn't essential as long as you do 'Step One' as the warm water should help soften your cuticles.
 
What to do:
 
1. Soak your hands for 2 - 3 minutes in the warm, soapy water.
 
2. Dry your hands off and get your scrub of choice. Massage a small amount of the scrub in circular motions all over your hands - don't forget in between your fingers!
 
3. Rinse your hands in the water and make sure they're super dry. Now you're going to file your nails. Make sure when you file that you pull the file in one direction only. Rubbing it backwards and forwards can cause nail splits and weakens the nail!
 
4. Soak again for a few seconds, then dry. Next we're going to work on our cuticles. Apply a small blob of cuticle lotion to your cuticles and massage in thoroughly. Rinse off. Now get your hoof stick (the little white thing) and gently push back your cuticles. If you don't have a hoof stick, you could twist a little cotton wool around the end of an orange wood stick, or even a cocktail stick.
 
5. Now that your nails are ready for painting and your skin is feeling soft, we're going to inject a little moisture with a hand lotion. Only apply a small amount so it doesn't create a film over your nails. Wipe your nails over with nail varnish remover just to remove the last of the oils that the previous products could have left.
 
6. Finally it's time to paint! I chose Rimmel's I Heart Lasting Finish in Marshmallow Heaven and topped it off with Rimmel's Matte Finish Pro for a textured look.
 
So there you have it! It literally takes not even fifteen minutes to do, I normally do this whilst watching back-to-back episodes of Glee (yeah, I'm a Gleek).
 
Look out for my next DIY Sunday post, as I'm going to show you guys how to do a 'professional' hand & arm massage!
 
xx

Wednesday, 7 August 2013

Boots & Poundshop Haul!

 
Hi everyone, hope you're all well.
 
Today I have a haul for you! I picked up these products today as I've become a massive nail art junkie lately and thought I'd expand my shade-range with a few cheap and cheerful polishes. I stopped off in Poundland first with the intention of getting some storage tubes to store my pasta (completely off subject, I'm sorry) and ended up walking out with three nail varnishes and four bottles of little 'nail seeds'. Then I went into Boots and saw that Miss Sporty was having a '3 for £5' deal on a range of their products which is when I picked up three more gorgeous nail varnishes. I was so tempted to grab one of their Hollywood Lip Glosses as they're included in the deal, but these shades really caught my eye and I couldn't justify spending another fiver!
 
 
Boots:
 
I had originally intended to pick up some Barry M nail varnishes, but when I saw the 3 for £5 offer I couldn't resist! I am a bit dubious about these, mostly because I've always associated Miss Sporty as a 'young' brand (I used their products when I was around 14) so I'm hoping that these nail varnishes will change my opinion on the brand. I picked up two 'quick dry' polishes and a 'long lasting' one, the purple being the long lasting and the yellow and the orange the quick dries. Irritatingly, the bottles don't actually mention the shade names (although they have them on the stand in Boots) so I looked online for you guys and got them! Dedication right there. Sadly, I only managed to find the name of the yellow 'Popcorn' and the orange 'Tangerine'.
 
I'm planning on doing a review on these, so keep an eye out soon!
 
Poundland:


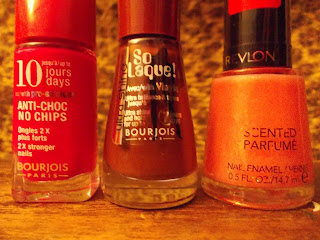
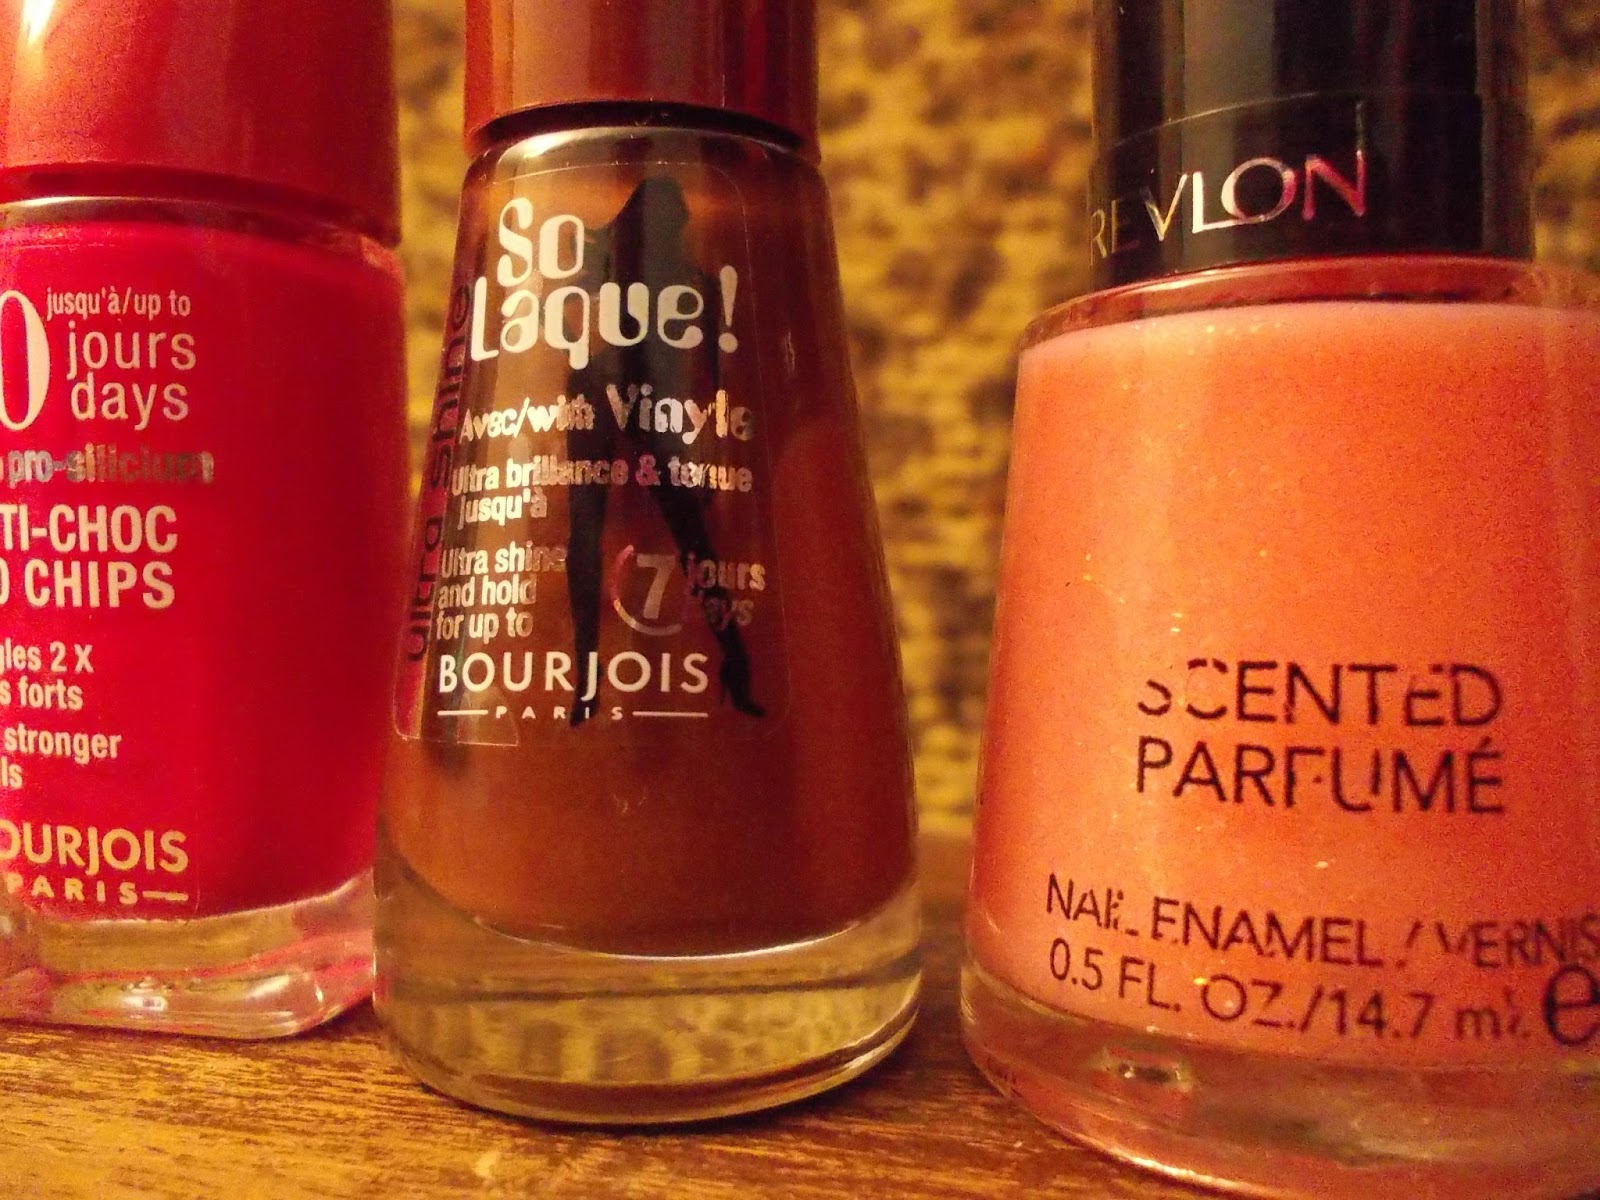
I picked up three nail varnishes in Poundland. Luckily as I was walking past, the sales assistant was just beginning to restock the make-up shelves so I got my pick of the shades! I got two Bourjois shades the red/pink and the delicious chocolatey brown, but sadly the writing on both of the bottles is in a different language so I couldn't work out the shade names! I also got this Revlon one, and I didn't actually realise it was a scented polish so I had a lovely surprise when I took it out of the packaging! The shade/scent of this is Grapefruit Fizz and I'm so hoping it smells like pink grapefruit. The shade is a gorgeous sparkly, shimmery pale pink with subtle flakes of silver glitter.  
 
 
The last things I picked up were these stunning 'nail beads'. They brand is 'Pink Tease' which I know is a poundland favourite, most of their make-up and nail varnishes are from that brand. These were only a pound each so naturally, I grabbed one of each. I've been pondering for so long about getting the Make Up Academy equivalent, but they were £3 each so it's a good thing I held it off! The colours of the beads are also really similar to those sold by MUA.


Look out for some nail arts and reviews featuring these products!
 
Hope you're all having a good week!
 
xx

Tuesday, 6 August 2013

Step by Step Monsters Inc Nail Art! (Monsters University)


I don't know what it is, but having cartoon characters on my nails puts me in such a happy mood. First it was my minions here & here and now I'm back with my Monsters Inc nail art!
 
Just like with the Minions, I took my little sister to the cinema to watch Monsters University along with my brother and my boyfriend (I think I enjoyed the film the most!) and thought I'd do a little nail art to show my appreciation of Mike Wazowski and Sully!
 
I'm sorry that the photo isn't the best quality, but my camera's still not warming up to me so I had to use my phone!


Like last time, I would like to point out that I am by no means an expert at nail art so it's safe to say anyone could do these nails! I chose my middle finger and my ring finger as the feature nails and kept the rest of them a simple white. I think this puts more focus on the characters, and also the little details like Sully's teeth and Mike's eye are white so it matches in a way!
 
To do this nail art I used:
 
Revlon's Blue Lagoon
 
Barry M Gelly in Prickly Pear
 
Rimmel I Heart Lasting Finish in Green Grass
 
Nail Fix's White (came with my college kit, so any other white nail varnish is fine)
 
Black Nail Art Pen
 
White Nail Art Pen
 
Alternatively, you could use a dotting tool and a nail art brush dipped in black/white nail varnish if you don't have a nail art pen to hand. Bobby pins are also great if you don't have a dotting tool.
 
 
Difficulty: Beginner.
 
Steps:
 
1. Paint your nails. I painted my ring finger in a bright green, my middle finger in a shimmery blue and the rest of my nails white. I applied two coats of each.
 
2. Using the white nail varnish brush, draw a large circle in the middle of the green nail. Tidy up the circle with the white nail art pen. You could just use the white nail art pen to draw the eye if you prefer.
 
3. Using the brush of the purple nail varnish (make sure there's hardly any nail varnish on the brush) drag it across the blue nail to create blobs. Make sure these blobs are as irregular as possible, as the purple markings on Sully's fur are a little more square shaped.
 
4. Once the white of Mike's eye is dry, draw a little mouth with the black nail art pen. I chose a half smile as I feel it matches his personality! But you could do any mouth you like. Add a small black dot in the centre of his eye.
 
5. Once Sully's purple markings are dry, draw both of his eyes with the white nail art pen. Whilst waiting for them to dry, draw a smile with the black nail art pen. Once dry, draw two small triangle teeth with the white nail art pen. Add two small black dots in the centre of his eyes.
 
So there you have it!
 
Although there are a few more steps to this one than the minions (I think), it's simply because everything is done in layers. A little patience is needed, but I did these whilst watching a movie (Avatar if you were wondering) so I barely noticed the drying times!
 
What do you think of this nail art? If you recreate it, I'd love to see a photo so tweet it to me: @laaurenpiperx
 
xx


Friday, 2 August 2013

Review: Rimmel Lasting Finish Pro Nail Varnish


If there's one thing that's important to me in a nail varnish is its longevity. With the current busy-ness of my lifestyle I have no time in the day to re-apply chipped nail varnish, meaning that I've more than often gone without recently! Cue Rimmel's Lasting Perfection Pro.
 
I scouted these nail varnishes in the Poundshop and feel their shimmery, summery shades and long-lasting formula are the perfect match for my busy lifestyle. There are a few others in the collection that can be found in Poundlands, but the only other one I've seen (and bought) is a dark sparkly blue shade I can't remember the name of (sorry!)


My two shades of choice are 340 Marine Blue and 350 Violet Metal, both iridescent and shimmery. Marine Blue is a gorgeous mid-blue shade that has hints of green when looked at from different angles.  Violet Metal is a purple/pinkish shade with hints of blue/purple when looked at from a different angle.  Both of these polishes applies like a dream and are super pigmented with only one coat.


 In this photo Marine Blue is definitely the nicer shade and Violet Metal looks really off-colour but I think it might have just been the lighting. It's much more beautiful in person! My favourite way to wear these shades is Violet Metal on my fingernails and Marine Blue on my toes!
 
xx


Thursday, 11 July 2013

Minion Nail Art #2 (Despicable Me 2)


Hi everyone, just a quick post to share this cute new version of the minion nail art I've shown you previously. For this look I used Revlon's Speed Dry nail varnish in Cupid, a silver nail varnish and a black nail art pen. But of course you could choose to do your minion any colour you like! If you're not feeling confident enough to do all of your nails as minions (as seen here on my other post) then this is a simple way to interpret the minions without the stress of perfecting all ten nails. As you can see from my photo, my minion is far from perfect but it keeps it original ;)


Step One: Paint all of your nails a colour of your choice. I chose a cute bubblegum pink. Once dry, use the long thin brush from the black nail art pen to create the minion's little clothing by sweeping it along the tip of your nail just like you would with French tips. This line can be as thick or as thin as you want, and the thickness doesn't have to match on each nail, messy lines are okay here!
Step Two: Mid-way up/down the nail, using the thin brush from the black nail art pen, draw a thick/thin black line. This is going to be the strap from the minion's goggles. Wait to dry.
Step Three: Create the minions eye with a white nail art pen/dotting tool dipped in white nail varnish. You can either choose to do one or two eyes, and you can also choose to use a silver nail art pen/varnish or even some glitter instead of simple white.
 
Step Four: Whilst your waiting for the eye to dry, using the pen tip of the black nail art pen, draw your minion a mouth. You can choose to do either a big smile, half smile, pout, anything!

Step Five: Using the tip of the black nail art pen, draw your minion a pupil in the middle of the eye. Wait to dry, and apply a top coat!
 
This is my current favourite way to wear minion nails as the colour is really summery and goes with a lot more outfits than classic minion yellow!
 
I forgot to mention this in the last post, but if you do try out minion nails then tweet me a photo on Twitter! I would really love to see them. My twitter is @laaurenpiperx
 
xx

Wednesday, 1 May 2013

MUA Nail Varnish in 'Bold Blue' Review!


I'm a big big fan of Make Up Academy products. I've used their eyeliners and brow pencils, I'm quite frankly obsessed with their lipsticks and I've added more than a few of their eye shadow palettes to my Make-Up Kit but I've never purchased a nail varnish until now! The shame! 

I have to admit, though, that the first thing that drew my attention was the bottle. How much of an obvious dupe is it to the fabulous Essie's?! Aside from being considerably smaller, they share the same bottle shape, lid colour and naturally the company logo stamped into the glass. 


ANYWAY, the second thing that attracted me was this gorgeous shade of blue. It's been dubbed 'Bold Blue' (finally the product shades have names!), and the colour sort of reminds me of what I would call 'sky blue'. 

And the product itself isn't too bad. The end result (after two coats) has a nice shine to it without a top coat and it lasted me at least 3 - 4 days before it began to chip. I'll admit the coverage isn't the best, but from a distance you can't really notice the odd streaky patch. The brush and bottle size are really quite tiny, especially next to my Barry M bottle, but for a £1 price tag I can't complain! I expect I'll get maybe four or five wears of this before it becomes a problem, but no doubt by then I'll have moved onto my next shade.


Have you tried any MUA nail varnishes? What did you think of them?

xo